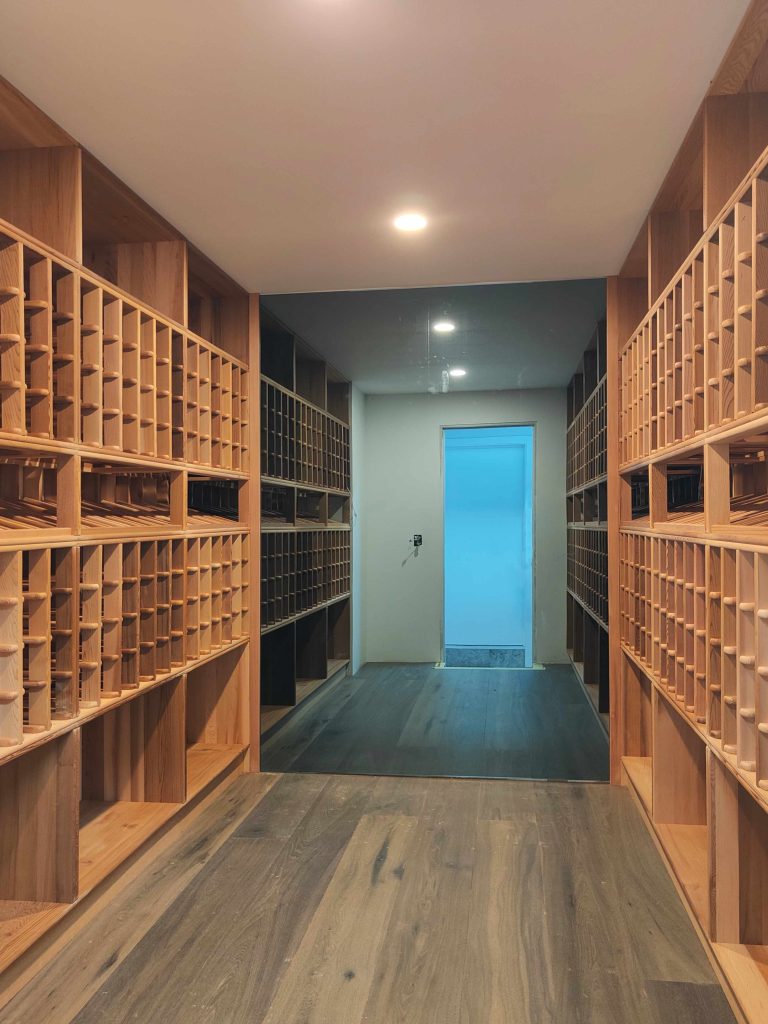
Building a wine cellar using Cellar Smart modular wooden wine components can be an exciting project that not only enhances the value of your home but also provides a dedicated space to store and age your wine collection. This guide will take you through the key steps to create a functional and aesthetically pleasing wine cellar with Cellar Smart components.
Step 1: Planning and Design
Before you start building, it’s crucial to plan and design your wine cellar. Consider the following factors:
- Location: Choose a cool, dark, and stable environment in your home. A basement is ideal due to its naturally cooler temperature, but any unused space can be converted, a properly insulated space is preferable for temperature stability but not essential.
- Size: Determine the size of your wine cellar based on the number of bottles you plan to store and the space available. Remember, wine collections often grow, so plan for extra space.
- Lighting: Use low-heat, low-UV lighting to protect your wine from damage. LED lights are a great choice.
- Flooring: Choose moisture-resistant materials like tile, stone, or sealed concrete. Avoid carpet, as it can retain moisture and potentially harbour mould.
Step 2: Preparing the Space
Once you’ve considered your wine cellar, prepare the space:
- Insulation: Proper insulation will aid in maintaining a stable temperature. Use insulation for walls and ceilings and a vapor barrier to prevent moisture build-up and to slow the rate of temperature change
- Walls and Ceilings: After insulation, cover the walls and ceiling with moisture-resistant drywall. For an added touch, you can finish the walls with wood panelling, stone, or other materials that complement your home’s décor.
- Flooring: Install your chosen flooring material, ensuring it’s level and sealed.
- Electrical Work: If installing a climate control system, ensure proper electrical wiring is in place. Install outlets for lighting and any other electrical components, such as a wine cooler or humidifier. As well as allowing for LED lighting
Step 3: Designing, Selecting and Assembling Cellar Smart Wine Racking
Now that your space is ready, it’s time to design your Cellar using modular wooden wine components from the Cellar Smart Design Room. These components are designed for easy assembly and customization.
- Design your Wine Cellar: Begin by entering the walls dimensions of your room. Select the components for the storage and display areas of your cellar room.
- Selection: Choose your material from Douglas Fir Timber, Black Painted Timber or Western Red Cedar Wine Racking, then place your order.
- Unpacking and Sorting: Begin by unpacking all the “Cellar Smart” components. Sort them according to type—racks, shelves, or display units.
- Assembly: Follow the manufacturer’s instructions to assemble each component. Most “Cellar Smart” components come with pre-drilled holes and all necessary hardware. Typically, you’ll need a screwdriver for assembly.
- Positioning: Start by placing the largest components, such as full-height racks, against the walls. Ensure each piece is level before securing it to the wall, especially if your cellar is on a slightly uneven surface.
- Securing: To avoid accidents, anchor taller components to the wall using the provided brackets. This is especially important if you live in an area prone to earthquakes or if you have young children who might wander into the cellar.
- Modular Setup: One of the main advantages of “Cellar Smart” components is their modular nature. This allows you to reconfigure the layout as your collection grows. Begin by placing essential racks and leaving room for additional pieces, like display shelves or bins, which can be added later.
Step 4: Organizing Your Wine
With your wine cellar structure in place, it’s time to organize your collection:
- Categorization: Organize your wines by type (red, white, sparkling), region, or vintage, depending on your preference.
- Labelling: Use labels or tags to identify each section. This makes it easier to find specific bottles and maintain inventory.
- Accessibility: Place frequently accessed wines at eye level or in more accessible locations, while rare or aging bottles can be stored higher or lower.
- Inventory Management: Consider using a digital inventory system or app to keep track of your collection. This helps monitor aging and ensures you consume or sell wines at their peak.
Step 5: Finishing Touches
The final step is to add finishing touches that enhance the ambiance and functionality of your wine cellar:
- Seating: If space allows, add a small seating area with comfortable chairs and a table, creating a tasting area within your cellar.
- Décor: Personalize your wine cellar with artwork, a wine-themed mural, or other décor elements that reflect your style.
- Security: Consider installing a lock or keypad entry system to protect your valuable collection.
By following these steps, you’ll create a well-organized, efficient, and beautiful wine cellar using Cellar Smart modular wooden wine components. Whether you’re a casual wine enthusiast or a serious collector, your new wine cellar will provide a perfect space to store and enjoy your collection for years to come.


